Playing Posture: Standing, Sitting, and the Neckstrap
Standing and seated posture, neck strap, the 45-degree angle, and hand position.
Opening Unit 2 — why the masters' first lesson is always posture
September 2, 2026 · Unit 2: "Foundations of Playing"
Previously: In Lesson 5 we closed out Unit 1 — the four-step assembly line (strap first; greased neck twisted in; wet reed; mouthpiece depth as your pitch knob), the "thirty-minute golden window" five-step cleaning routine, and the periodic maintenance schedule. The horn is cared for; from today we enter Unit 2, "Foundations of Playing." And the first lesson of this unit is neither the mouth nor the breath — it's how to hold your whole self.
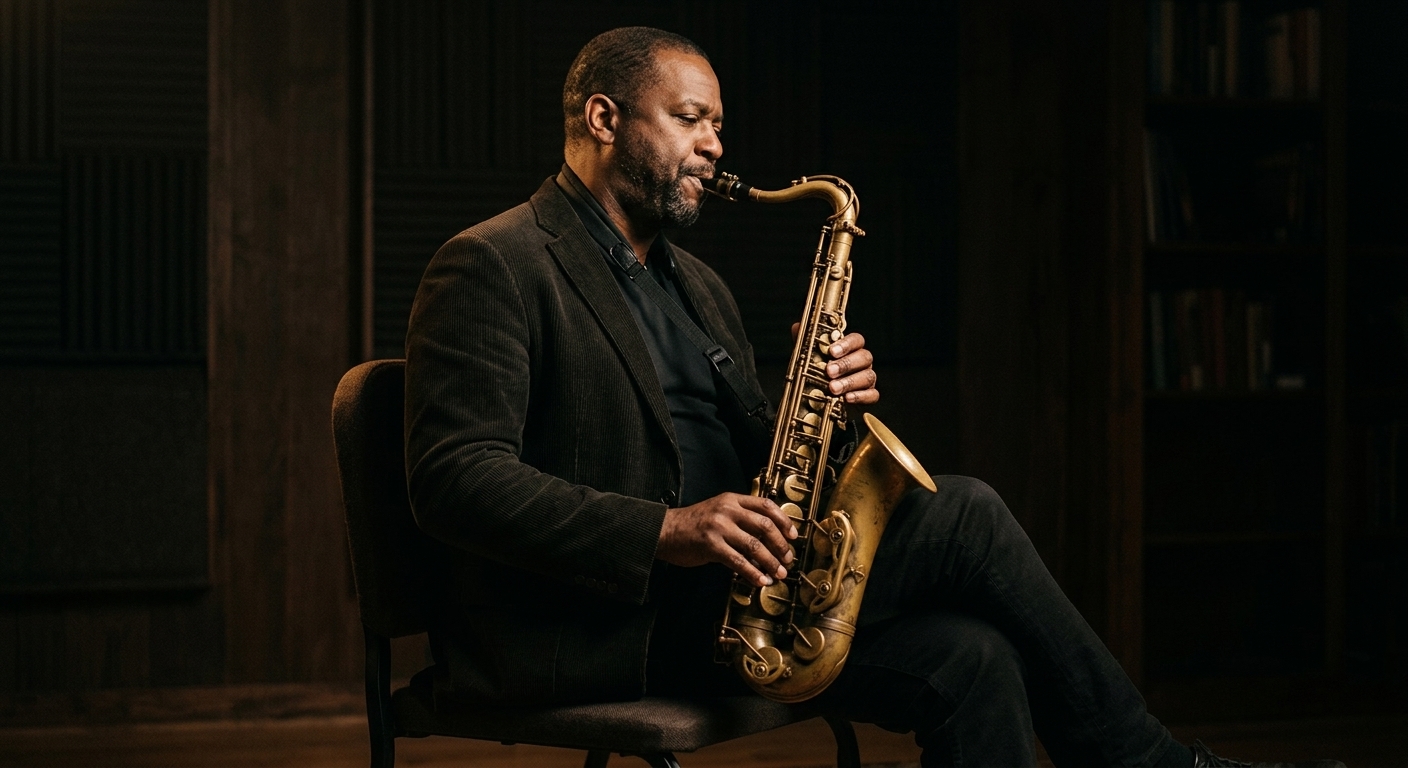
1. Why Posture Is Lesson One
Look across the various schools of saxophone teaching and you'll notice something intriguing: whichever expert opens a course, the first thing they teach is posture, not "how to make a sound." That isn't ceremony — there is a tightly linked chain of cause and effect:
Crooked posture → breathing is restricted → the breath fails → attack, intonation, tone, and dynamic control all suffer. Conversely, sit tall and stand straight, and the chest can open and the air can sink deep. The position of the head, arms, and body, the angle of the mouthpiece in the mouth — every detail connects directly to how the breath is used. So posture is not an "image problem"; it is the foundation of the entire technical edifice. If the foundation leans an inch, every floor above needs rework.
More practically: once wrong posture becomes habit, the cost of correcting it far exceeds learning it right from the start. That is the real reason it deserves Lesson One.
2. The Neckstrap: A Seriously Underrated "Third Hand"
The most common beginner mistake is using both hands to "hold up" the saxophone. Try holding it for ten minutes and you'll find: fingers stiff, wrists sore, arms unable to lift — and once the fingers stiffen, the agile fingering of Lesson 16 becomes empty talk.
The correct division of labor: the strap carries the entire weight of the instrument, and the hands carry none of it. What counts as a properly adjusted strap? Two criteria: first, it truly bears the full weight of the horn; second, all tension in the hands and arms disappears completely. Meet those two, and the fingers can devote themselves to the keys in a "zero-load" state, as relaxed as a pianist's hands resting on the keys.
Once the strap is set, hang the instrument at the right-front of your body, with the back of the lowermost section of the body resting lightly against the outside of your right thigh — the thigh here is just a "parking spot" for stability, not a support point. The whole system forms a three-way balance: the mouth controls the mouthpiece, the two hands handle navigation, the strap handles the load. Each of the three roles does its own job; if one oversteps and steals the show, the other two must compensate, compensation breeds tension, and tension caps your technique.
3. Standing and Sitting: One Ruler to Measure Both
Playing standing or sitting gets slightly different wording across teaching traditions, but the ruler underneath is the same: make the body an unobstructed pipe for the breath. The specific requirements, unpacked:
| Area | Standing | Sitting | | --- | --- | --- | | Legs | Feet shoulder-width apart, naturally planted | Legs together (or slightly apart), never crossed | | Upper body | Head, shoulders, and torso naturally upright; back, chest, abdomen, waist — not one of them bent; imagine a thread gently lifting the crown of your head | Sit on the front half of the chair; don't sink back into the chairback | | Overall feel | Tall but not rigid, relaxed but not slumped | The same |
A special word on why sitting forbids crossing your legs: cross them, and the pelvis immediately tilts, the spine bends sideways with it, and the muscles of the waist and abdomen change state — and that waist-and-abdomen region is precisely the "power plant" of the air column in the upcoming breathing lessons. When seated, sit on the front half of the chair; the moment you lean back into the chairback, your chest cavity is compressed by a third.
Standing or sitting, which to choose? For practice, favor standing — the body is most open and the airway clearest; sit for ensemble and rehearsal settings. But whichever it is, the old saying holds: the upper body stands like a flagpole so the breath can spread like the flag.
4. That Mysterious 45 Degrees
The angle of the mouthpiece in the mouth is the most easily overlooked yet most particular detail in the whole posture lesson. The principle is plain: go with the flow.
When you exhale naturally, the airflow already tilts slightly downward. The angle between mouthpiece and neck should follow that airflow — since the air runs slightly down, the mouthpiece tilts slightly down, letting the air pour into the tip opening "on its original route," without extra bends or forced angles. That angle is roughly around 45 degrees (with the jaw thrust slightly forward, keeping the chin off the chest).
Why not blow level or dip too low? Level, and the airflow is forced to bend downward — the throat tightens; too low, and the neck pinches shut and the cervical spine compresses, narrowing the airway again. The 45 degrees isn't mysticism; it lets the breath take the most economical path. The test is simple: exhale naturally once, watch where the air goes, and let the mouthpiece follow.
5. The Fingers: Light "Guests" Resting on the Keys
Finally, the hands. The strap section already established: hands at zero load. With zero load, the fingers' correct state is:
- Relaxed but not slack: fingers, wrists, forearms, shoulders — relaxed all the way up, yet the fingers stay lightly in contact with the keys, neither hovering nor wandering;
- Arched fingers: both hands naturally curved with the knuckles slightly arched, as if each hand held a small egg — never flattened flat; collapsed-knuckle fingers are both slow and springless;
- Lift one finger's thickness: keys only need to rise about the thickness of a finger. Higher lifts mean slower descents, more noise, and wasted effort;
- Rhythmic fingering: crisp, clean lifts and drops, moderate force, no stiffness — you may not feel the weight of this one now, but when you reach tonguing and fast scales, come back and reread it; every word is gold.
A first impression of the hands' division of labor: the left thumb manages the T key on the back (doubling as the octave key), the left little finger handles the side keys at the lower left; the right hand supports the lower body, its little finger managing the low keys at the lower right. The specific fingerings will be assigned seat by seat when we sound our first notes in Lesson 13.
Here's a zero-cost self-check to assign yourself: practice in front of a mirror. Every postural fault — hunched shoulders, rounded back, tilted head, collapsed fingers, a mouthpiece angled too far up or down — the mirror cannot be fooled by any of them. Before each day's practice, stand before the mirror for one minute and scan head to toe before you start to play.
Key Points of This Lesson
- The causal chain that makes posture Lesson One: posture → breathing → attack/intonation/tone/dynamics; if the foundation leans an inch, every floor gets rework;
- The strap bears all the weight, adjusted until "horn supported + arms fully relaxed"; the instrument hangs at the right-front of the body, its lower back resting lightly against the outside of the right thigh;
- The three-way balance: mouth manages the mouthpiece, hands navigate, strap carries — whoever oversteps causes the trouble;
- Standing: feet shoulder-width; sitting: legs together, never crossed, on the front half of the chair; upper body upright — back, chest, abdomen, waist never bent;
- The 45-degree principle: the airflow naturally runs slightly downward; the mouthpiece tilts with it, "pouring into the tip opening on its original route";
- Fingers at zero load: knuckles arched as if holding eggs, lift about one finger's thickness, relaxed but not slack, rhythmic fingering;
- One minute of mirror self-check daily.
Questions to Check Your Reading
- Why does "holding up" the instrument with your hands ultimately ruin your fingering technique? What is the chain of transmission?
- How does crossing your legs while seated affect your tone, step by step? (Hint: pelvis — spine — waist/abdomen — air column)
- What determines the 45-degree angle? What happens to the airflow if you raise your chin and blow level?
- What counts as a properly adjusted strap? What two criteria test it?
Next Lesson: The frame is set; next we enter the true core technical zone — Lesson 7, "Embouchure (Part 1): The Standard Embouchure and the Sweet Spot." How do the O-shaped smile, the lower lip over the teeth, the upper teeth on the mouthpiece, and the four words "firm yet relaxed" land in practice? And how do you discover that one-third take? See you next time.
Continue Learning
Ready for the Next Step?
Follow our beginner learning path to build your saxophone fundamentals step by step.