Embouchure (Part 1): The Standard Embouchure and the Sweet Spot
Standard embouchure: O-shape, lower lip over teeth, finding your sweet spot.
The mouth is part of the instrument — the four-word kung fu of "firm yet relaxed"
September 2, 2026 · Unit 2: "Foundations of Playing"
Previously: In Lesson 6 we built the frame — the strap as "third hand" carrying all the weight; the three-way balance of mouth on mouthpiece, hands navigating, strap bearing; both postures honoring the ruler of "the body is the breath's pipe"; the 45-degree angle following the natural airflow; fingers at zero load, knuckles arched as if holding eggs. Today we finally arrive at the mouth — your first true "contact" with the instrument's sound.
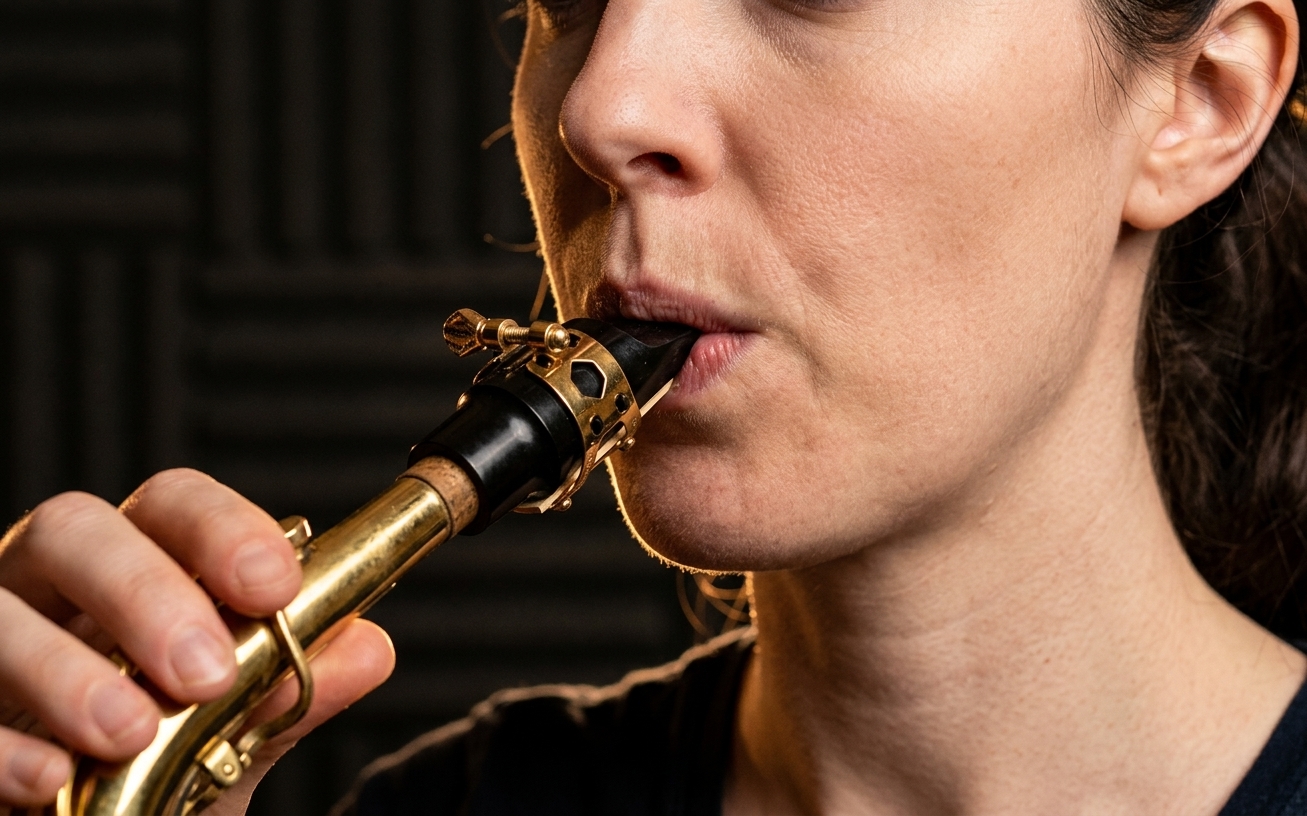
1. What Exactly Is Embouchure?
Let's define the term thoroughly first. Embouchure, as commonly defined in the field, is the wind player's placement of the mouthpiece between the lips according to musical principles and breathing method, together with the controlled state of the muscles around the lips and face. Unpacked, it consists of two things: where the mouthpiece is "placed," and how the lips "manage" it.
Many people assume embouchure means "stuff the mouthpiece in and bite down" — the biggest misunderstanding of all. Embouchure is not a bite; it is a precise system of muscle control. The saxophone's sound-production chain is "breath → reed vibration → air-column resonance," and the embouchure is the "gate" at the reed-vibration stage — gate too loose, and all the air escapes, leaving the sound hollow; gate too tight, and the reed is pinched dead, the air can't get in, and the sound chokes. The state the embouchure needs is captured in four words: firm yet relaxed.
Those four words sound contradictory but actually operate on different levels: the lip muscles must be "firm" — they surround the mouthpiece to form an airtight seal; while the face, chin, and neck must be "relaxed" — they must not join the struggle. Think of a tire: the rubber is genuinely strong, but inside is air — elastic. Your lips are the tire wall; the airflow is the air within.
2. The Standard Embouchure in Three Sentences
The essentials of the standard embouchure vary slightly in wording across teaching traditions, but the skeleton is the same, condensed into three sentences:
Sentence one: Form an O with the mouth, shaped as when saying "eh" ("ai" sound). Note it is "eh," not "ee" and not "ah." "Ie" pulls the corners of the mouth back and stretches the lips thin, stiffening the surrounding muscles; "ah" opens the mouth too wide and drops the chin. "Eh" happens to gather the lips naturally into an oval, with corners neither frozen nor leaking — imagine softly saying the syllable "ai" to yourself; your lips are already in the right state.
Sentence two: Roll the lower lip in over the lower teeth; both cheeks press against the gums. This sentence is the core action of the whole embouchure. The lower lip is a soft cushion, rolled inward to cover the lower row of teeth so they no longer press directly against the reed — the reed is supported by this "flesh cushion," not bitten by the teeth. The cheeks draw in against the gums, filling the sides of the oral cavity, so the air can't go wandering through your cheeks. By the way, this is why many newcomers' cheeks ache after playing — that's the smiling muscles fighting; in the standard state the cheeks "press against," not "puff out."
Sentence three: The upper teeth rest on the mouthpiece. The lower lip is the cushion; the upper teeth are the fixed anchor. The upper row of teeth comes down lightly on the top of the mouthpiece, providing a stable fulcrum for the whole embouchure — this is the saxophone embouchure's often-cited "firm above, soft below" structure: fixed above by the teeth, cushioned below by the lip. With the two working against each other, the mouthpiece is securely "locked" in the correct position — it can't wander, and the reed keeps its room to vibrate.
3. How Deep: Two Reference Numbers
How much mouthpiece to take in is the question newcomers ask most. Two common reference numbers circulate in the field: take in about one-third; more precisely, the upper teeth sit about half an inch (about 1.27 cm) from the mouthpiece tip. For a typical alto mouthpiece, the two descriptions point to roughly the same place — a bit back from the tip, before the back edge of the table.
But it must be emphasized: these numbers are a starting point, not a destination. The size of the oral cavity, thickness of the lips, length and alignment of the teeth, even the mouthpiece model — all make the "optimal amount" differ from person to person. These numbers give you a baseline so you can set out from there to find your own answer.
4. Finding Your Own "Sweet Spot"
This is the hands-on core of the lesson. There is a wonderfully practical exploration method, in two directions:
- From less to more: start with very little mouthpiece from the front and test-play, then take in a little more each time — a bit more, play, listen;
- From more to less: start from taking in a lot, then reduce bit by bit toward the front, again playing and listening as you go.
Probe back and forth in both directions, comparing the tone repeatedly, until some position makes the sound light up your ears — a sound that is both full and round like a woodwind's and transparent with a metallic brightness. The field calls it the "sweet spot." Once found, fix your mouthpiece position there and start from that baseline every time you play.
Why does depth affect tone? Back to the physics: take in too much and the reed's effective vibrating length is shortened and "deadened" — the sound turns stuffy and tight, pitch runs high; take in too little and the reed over-vibrates — the sound turns hollow, floaty, and leaky. The sweet spot is that sweet zone where the reed is "freely vibrating yet steadily supported by the lips." Incidentally, embouchure is not frozen — it naturally tightens somewhat in the high register and relaxes in the low; but more on that later, in Lesson 8 on faults and Lesson 9 on breathing.
Practice tip: work through this section in front of a mirror. The mirror tells you three things — whether the mouth is shaped like "ai," whether the lower lip truly covers the lower teeth, and whether the cheeks puff. Earlier lessons mentioned "mirror self-checks" — today is its first real deployment.
Key Points of This Lesson
- Embouchure = mouthpiece placement + control of the lip-surrounding and facial muscles; it is the "gate" of reed vibration;
- The core state "firm yet relaxed": lips firm as a seal; face, chin, and neck relaxed and unstrained — like tire wall and the air within;
- The three standard sentences: O-shaped mouth as in saying "ai"; lower lip over the lower teeth, cheeks against the gums; upper teeth on the mouthpiece (firm above, soft below);
- Reference numbers: about 1/3 of the mouthpiece, upper teeth about 1/2 inch (≈1.27 cm) from the tip — a starting point, not a destination;
- Finding the sweet spot: probe from less to more and more to less; let your ears decide — fix the position where "woodwind roundness and metallic brightness" coexist;
- The embouchure adjusts dynamically with register; the mirror is the only honest judge.
Questions to Check Your Reading
- In "firm yet relaxed," which part is firm and which is relaxed? Why can't everything be tight at once?
- Why does the standard embouchure stress the "ai" shape rather than "ee"? What consequences does the difference bring?
- What kind of tone do you get from taking in too much versus too little mouthpiece? Explain via the vibration principle.
- Why does "upper teeth on the mouthpiece" provide a stable fulcrum? What would happen without it?
Next Lesson: Once you start practicing the standard embouchure, the most common faults come crawling out — the chin thrusting up, leaking corners, puffing cheeks, the mouthpiece drifting left or right. Lesson 8, "Embouchure (Part 2): Common Faults and How to Fix Them," takes them apart one by one: what each fault looks like, where it's rooted, and how to prescribe for it. See you next time.
Continue Learning
Ready for the Next Step?
Follow our beginner learning path to build your saxophone fundamentals step by step.